Table of Contents
ToggleInstalling A Door Closer
In order to comply with codes, garage entry doors, fire doors, and some entrances in apartment buildings frequently need to have automatic door closers installed. Storm door closers ensure that a vehicle running in the garage won’t cause fumes to enter the house. A door closer also means the entrance will definitely be closed if there is a fire in the space. An automatic door closer is a significant improvement over spring-loaded hinges, which are typically the bare minimum.
A hydraulic door closer mechanism is well worth upgrading because it has adjustable speeds and closing force. However, installation is more difficult than with a spring-loaded joint. Here is all the information you require regarding how to set up and install an automatic door closer.
Tools and Supplies For Installing Door Closers
- Utility knife
- Painter's tape
- Pencil or other marking tool
- Measurement tape
- Speed square
- Safety glasses
- Gloves
- Drill and bits
- #3 Phillips bit or screwdriver
- Hex keys
The door closer package will come with everything else you need. Most even include paper templates you can attach to the door to mark exactly where to position the drill without having to measure.
Step 1: Determine Which Way The Door Swings
You should ensure you’re installing your commercial automatic door closer the correct way because there are a few different things to keep in mind. With the door open and with your body facing the hinges, you can figure out which way the door’s swing will be by standing in the door frame. The entrance is a right-hand swing door if it is on the right. The entrance is a left-hand swing door if it is on the left.
Determine which side of the door you want to put the latch and the closer components on after determining the door’s swing. The closer can typically be installed and mounted on the garage side or room side since you’ll want it to not be visible from the inside of the living area.
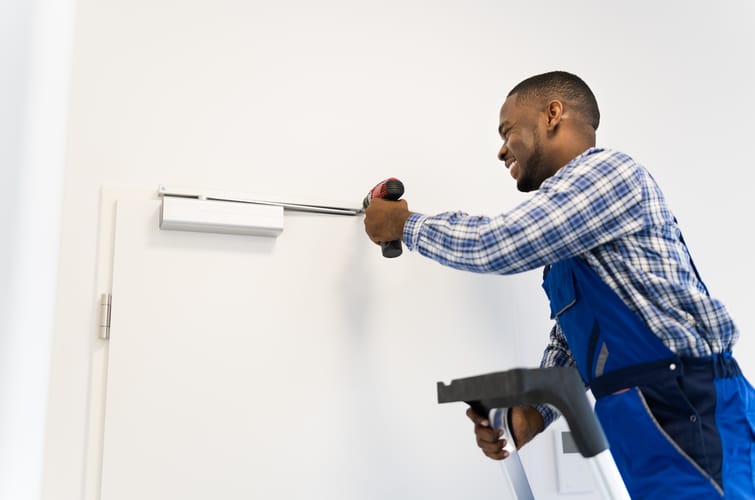
Step 2: Mark The Drilling Sites On The Door Frame
The template in your kit might offer choices for both left- and right-handed doors. Select the template that is appropriate for the position and shape of your door, carefully cut it out with your utility knife, and adhere it to the door using the recommended adhesive.
If your kit didn’t arrive with a template, use the drill location instructions provided by the manufacturer. Be careful to measure from the door’s hinge side. Using your pencil, mark the distance of each set of holes from the door and hinge. Make a vertical line at both pencil lines while positioning the speed square up against the top of the door.
Mark the height of each hole on the wall with these vertical pencil lines using your tape measure or the rule on the grid. For guidance on where to drill on the door jamb to attach the screw for the swingarm, refer to the manufacturer’s directions.
Step 3: Drill The Holes
Put on safety eyewear and gloves, which are beneficial if you’re drilling through a metal frame or door. Drill pilot holes on the marks you just made using a power drill and a smaller drill bit before stepping up to the proper bit (typically 3/16, but check the manufacturer’s instructions). Drill only to a depth of 3/4 inch in the existing holes; don’t go all the way through the door.
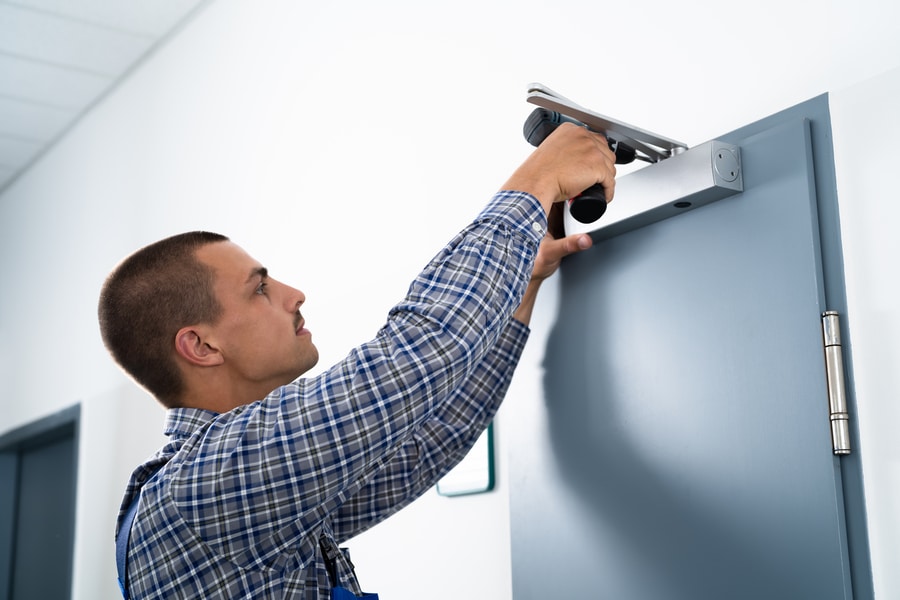
Step 4: Install The Body Of The Door Closer
Install a #3 Phillips bit into your drill for this step because most door hardware of all types employs them. Attach the door closer to the door in accordance with the instructions using the screws provided in the package. When installing screws on the door closer, pay close attention while following instructions so you’ll know which way is up.
Step 5: Install The Swingarm Door Bracket
Use the provided fasteners to secure the jamb bracket for the swingarm to the door jamb while the #3 Phillips bit is still in the drill. For this component, it can be simpler to separate the bracket for the arm from the closer because one of the holes can be very challenging to access when the closer is under tension.
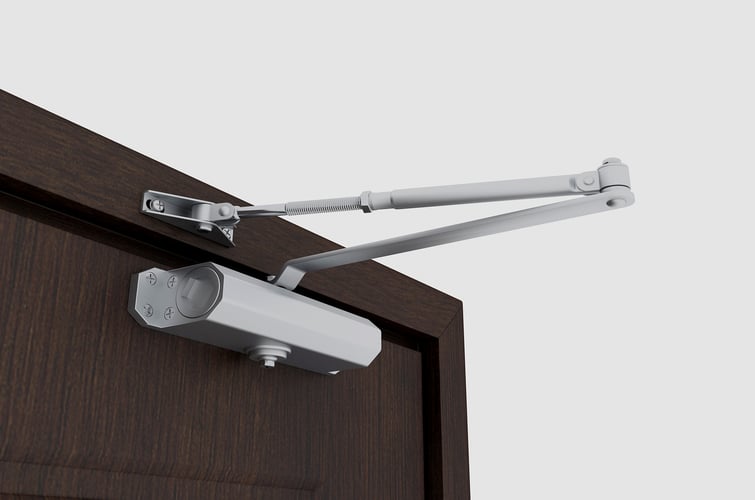
Step 6: Attach and Adjust The Swing Arm
Now, you should reconnect the closer’s swingarm (if you took it out) and make adjustments so that it can close properly. Check the kit’s instructions, but typically this entails removing the arm’s set bolt and adjusting it so that the swingarm’s jamb side is parallel to the jamb.
Tip: Door Closer Adjustment
Install the cover and take pleasure in the results of your work after you have adjusted the closing speed. With much more flexibility than spring-loaded hinges, you’ll have a door that complies with building codes. Even though each kit varies slightly, the assembly and installation steps are similar and can be completed by an experienced do-it-yourselfer. You won’t have any trouble completing this task on your own if you meticulously measure, mark, and drill, but if you’re not up to the task a professional locksmith will be able to help you.
